How to Look at Relics and Documents Again Tomb Raider
Contents
- 1 A Common cold Welcome
- 1.i Find a Identify to Have Shelter
- ane.2 Gather Resources To Build A Fire And Shelter
- 1.iii Return to Camp and Build a Burn
- 2 Echoes of the Past
- two.1 Explore the Forest for Signs of the Lost Metropolis
- two.2 Investigate the Ruins
- 2.3 Gather Resources and Heal Injuries
- 3 Best Laid Plans
- 3.ane Find a Way to Defeat the Behave
- 3.2 Observe Mushrooms for the Poison Pointer Upgrade
- three.3 Notice Cloth For The Poison Arrow Upgrade
- 3.iv Sneak or Fight By the Trinity Soldiers to the Bear Cavern
- 3.5 Defeat the Comport
- 3.half-dozen Explore the Cave to Observe an Go out
A Cold Welcome
Find a Place to Take Shelter
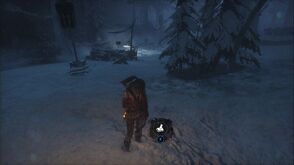
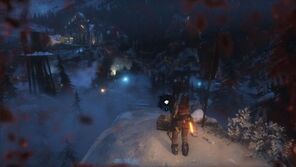
After seeing what has brought Lara to the Siberian Wildeness, y'all are returned to the present. She has been separated from Jonah, and she'south solitary in the center of a blizzard. Wade through the snow and don't look around for collectibles. You need to find a place to residue starting time. Walk forward and turn right equally information technology starts to descend.
You will find an old campsite not as well far away. All you need is wood to make a fire.
Get together Resource To Build A Fire And Shelter
Walk to the east: Yous will observe two small dead trees you tin suspension for hardwood , and a
dead stag with which you gain hides and a deer antler . Approach these items and press Interact to assemble everything.
Return to Military camp and Build a Burn down
Bustle back to the camp and utilize your newly-found resorces to start a fire. Lara will then use her time to craft a bow.
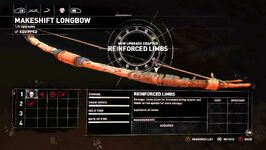
Your first weapon out here is the Makeshift Longbow . While you are still at the base military camp , go to the Weapon Upgrade menu and click on the bow. See if you lot accept whatever materials to add annihilation to the bow. You tin addReinforced Limbs to your new weapon for just three hardwood and three hides. Craft your upgrade and go to the Skills menu. Use your outset indicate to invest in a skill from i of the iii lines: Brawler, Hunter, or Survivor. Get out the base army camp later on you've decided.
Echoes of the By
Explore the Forest for Signs of the Lost City
Have a few minutes to wander around and get used to your weapon.
Start by heading down the hill to where y'all constitute the dead deer and trees before. Use yourSurvival Instinctsto discover a few items: a bird'due south nest and some other sapling . Now holdLT/Correct Mouseto depict your bow. You will soon see an on-screen tutorial on how to charge your shots. This is non necessary right now, simply the charged shots are more than powerful then the regular shots. Go on holding down the draw button and aim at the bird'southward nest and burn your arrow. This knocks the nest to the ground, so go over to information technology and press Interact. You will gain a few feathers .
Motion over to the pocket-sized tree yous saw a moment ago and press Interact to gather hardwood . At present, without drawing your bow, holdRT/Left Mouseto craft arrows with the wood and feathers yous but gathered.You do not have unlimited arrows, and yous must observe and make them for gainsay and hunting. Now to gather some collectibles.
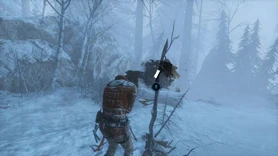
Starting from the tree you just bankrupt for hardwood, go to right and down a slope, until you come to the tree trunk laying across the path. Look to the left to find a document .
Hop down from the ledge and go dorsum to the fallen tree. Utilize yourSurvival Instincts to spot a backpack on the ledge nearby. Climb up to it and pressTen/Eastward/Square to look at information technology. This is a explorer'due south satchel . Information technology reveals the locations of coin caches , documents , and caves nearby.
NOTE: There is a rope-wrapped barrier nearby. Y'all need rope arrows to pull it down, so make a annotation near returning hither later in the game. Beyond the bulwark is a relic .
Annotation: Another explorer's satchel is just south of the kickoff i you found. But information technology is blocked by an touch on barrier that requires the shotgun or explosives to break. Brand another annotation to return here afterwards with your new gear.
Continue running downhill to the e, where you will find a monolith and a survival cache . The cache is buried to the right of the monolith. If you attempt to read the monolith, you will learn that Lara does not accept enough Mongolian to read it for now.
From the monolith, head to the north, down the slope. Equally y'all enter the abandoned army camp below the monolith, a flare brightens the sky. Lara hears something over a radio.
Investigate the Ruins
Run away from the abandoned camp to the northwest until you spot a wooden wall that Lara tin scramble on. When you lot're up on the ledge above, bound to take hold of the rope line and climb beyond to a college, wooden platform. Drop downward from the rope and collect the archivist map , which reveals the locations of the residuum of the documents and relics in the area.
Note: The on-screen message will say the map shows the locations of murals as well, but that is incorrect. Also, one of the remaining documents in the expanse has a lock symbol on top of it on the in-game map, meaning you lot cannot get together it just yet.
Drop down from the platform and go over to the snowy expanse just north of the military camp. Dig up another survival cache . Climb onto the rock ledge to the left of the fallen tree to find a relic . Follow the prompts to examine the antiquity. When y'all encounter the area where the crown is divide, you lot proceeds bonus XP, and if y'all constitute the first document earlier, you can now translate Level 1 Mongolian.
Return to the monolith you lot found before. Examine it to observe the locations of the money caches in the area. Dig up the nearby money enshroud (Proceed the in-game map and gear up a waypoint on the cache if y'all're having trouble finding it). At present go back to the expanse where y'all institute the relic and dig up another coin cache , in the alcove by the tree.
Caput upwardly the hill and go along the cliff wall to your right, until you see a tree with a cherry flag hanging from it. Scramble up the tree and grab the broken branch. Bound from there to the ledge. On the ledge you will find a money in a container and a document .
Become up the hill to a drop-off. Look down and to the right to spot the concluding survival enshroud . Climb downwards and dig information technology up for crafting items.
Just across the cache, the path splits. The correct fork leads to the base of operations camp . So have the left path and climb onto a apartment boulder to find a document .
Now that you've gathered enough, approach the objective mark. Climb up a tree and jump from the branch over to the objective's area, and gather a document . Head into the camp alee and you will find a radio someone from Trinity has abased. Lara will before long get attacked by a bear . Don't waste matter a 2nd: RUN!
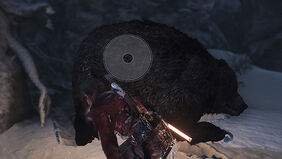
Sprint away from the comport and time your jumps. At the finish of the encounter, there are a few QTEs. But lucky for you, the screen gives you prompts on when to printing the button. Dodging and attacking the bear take very gentle timings: you simply accept to press the button when it shows up. Just the final attack at the cease of the chase has very precise timing. This is indicated by a collapsing circle that appears higher on the screen. Do not hit the push button early; it's very easy to mess that up.
Stay calm and hit the button exactly when it gets to the inner circle. This is the only manner to live.
An event will play after information technology'south done. It finishes as Lara wakes up and is wounded. You take to take care of these injuries.
Get together Resource and Heal Injuries
Walk forward and gather a few ingredients. They are all marked as objectives and aren't too far away. Snatch them up and press the Left Bumper/L1 to heal Lara.
Yous will also spot a few things while you are at the southern edge of the map. That's not a style yous can proceed now, so you need to come up with a programme.
All-time Laid Plans
Detect a Fashion to Defeat the Bear
Climb upwards the wooden wall and walk through the nighttime tunnel. Lara spots death cap mushrooms, which she realizes could be a fashion to impale the bear.
Detect Mushrooms for the Poison Arrow Upgrade
Pick upwardly the mushrooms . You'll need to detect 2 more clusters of them. Go along through the tunnel to reach an water ice wall. But before yous climb upwards, grab the low ledge to the ledge and scramble upwardly to discover a container filled with herbs . Then climb upwards the ice wall. At the summit, scissure open the small crate to gain save . This is used for upgrading weapons. Approach the border and spring to grab the zip line. Zip down into the abased army camp.
Head over to the cave that'southward but north of the old campsite. Enter and pick up the two bundles of mushrooms that are inside.
Find Cloth For The Poison Arrow Upgrade
Continue deeper into the cave earlier hunting for cloth. When the cave widens, in that location are two magnesite ore deposits on the wall. Pry them out with your axe. Later on, you can brand things with them. Farther into the cave yous volition observe a document . Exit the cave.
Back at the abandoned camp, you could search around nearby to find cloth in a few crates.
When you lot take enough, Lara says to go dorsum to the base camp and make some arrows.Simply right earlier you reach the camp, become to the left of the fire and drop down. Dig upward the last coin enshroud . Then go to the camp. When yous are at the camp, go to the inventory screen and so poison arrows .
This is too a good time to upgrade skills and your bow if you've been scavenging. Lara goes to sleep when you have finished. A scene plays and Lara wakes earlier morning. Trinity soldiers are here, and they're close by.
Sneak or Fight By the Trinity Soldiers to the Bear Cavern
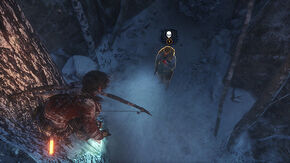
You regain control of Lara equally she hides perched in a tree above a Trinity man. Await until the Melee icon appears over his head and so you can bound down and kill him in a stealthy way. Multiple Trinity Soldiers are roaming the area. Use stealthyTakedownsto eliminate them and don't forget to loot their bodies. In that location is a Claiming in the area to loot the bodies of 3 Trinity soldiers , and this tin can easily exist accomplished right now. The third target is just downward the loma a little.
Avoid the residue of the Trinity soldiers on the fashion to the deport's cave , or you lot can fight them if y'all wish.
But at the abandoned army camp, the identify is not so abandoned anymore. Accept out the men quietly and grab the document that is now sitting on the table in the eye of the camp.
Next, find the red tin nigh their camp. Acquit the tin upwards the hill and drop it downwards adjacent to the touch bulwark. Stand up back and shoot information technology to blow open the barrier. Inside you lot volition find a relic .
Annotation:If y'all cannot detect the gas tin can, you tin can return later to the barrier with the shotgun or other explosives .
After you take out everyone in your way, return to the carry cavern. While you're there, finish and craft a few toxicant arrows and get the layout of the area outside the cavern. This is where the fight will take identify.
Defeat the Bear
Sneak into the cave and use a poisonous substance arrow to slam the acquit equally hard as you can. It is disabled for a short menstruum of fourth dimension, so use that time to sprint out of the cave and get into a good position to shoot when it comes lunging out. Craft more poison arrows, then shoot them at the conduct to disable it when it appears and repeat. Soon, the conduct will fall. Skin him for bear hide .
Explore the Cavern to Notice an Get out
Go into the cave and grab modest items. Beyond the dead deer is a document . Then bust through the damaged wall at the back of the cavern. This passage takes you to the adjacent area.
| Rise of the Tomb Raider Walkthroughs | |
|---|---|
| Mountain Peak · The Prophet'due south Tomb · Siberian Wilderness · Glacial Cavern · Soviet Installation · Abandoned Mines · Geothermal Valley (Start Visit) · The Acropolis · Geothermal Valley (Second Visit) · Flooded Archives · Geothermal Valley (Third Visit) · Soviet Installation (Copper Mill Bridge) · Research Base · The Orrery · Path of the Deathless · The Lost City · The Chamber of Souls | |
Source: https://tombraiderwalkthroughs.fandom.com/wiki/Siberian_Wilderness_Walkthrough
0 Response to "How to Look at Relics and Documents Again Tomb Raider"
Post a Comment